
Back in my second last post, I wrote about the Genesis Framework review and then I continue with a post on how to install WordPress into your web hosting.
Although the Genesis Framework is a great Framework, but there are still some small learning curve before you can familiarize it.
Since I had already been through this framework numerous times, I had figured out that most of the times, I am repeating myself when I start with a new site.

So, if you want to start a blog today specifically with the Genesis Framework, read these tips to get started with it.
10 quick tips for your Genesis Framework
#1 – Install the framework
Installing the framework is pretty easy.
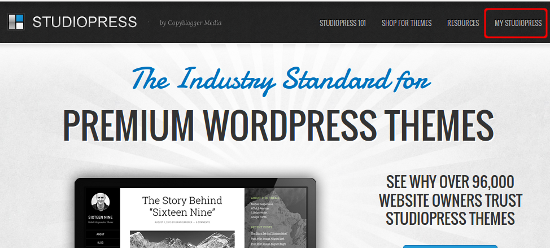
First, go to the Studiopress site and click on My Studiopress.
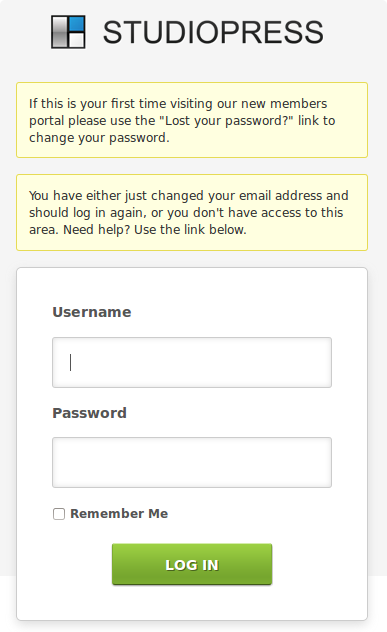
Supply your credentials and then login into the site.
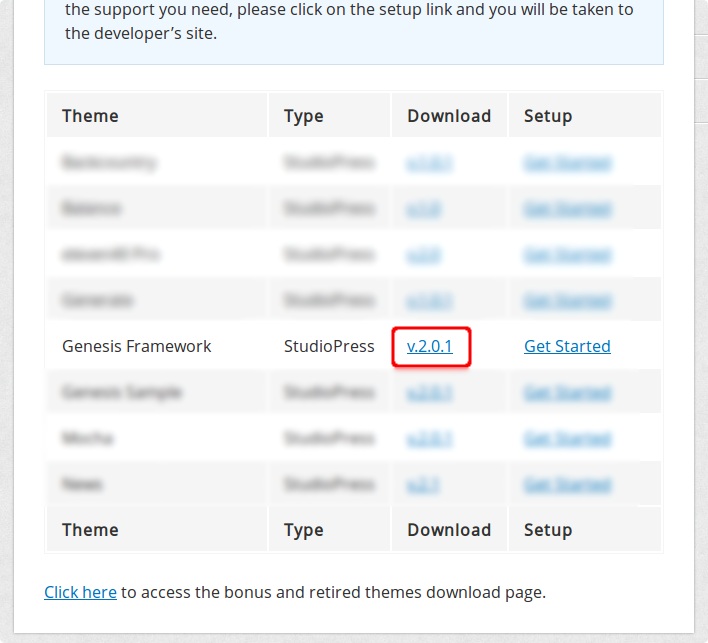
Locate the Genesis Framework and click on the version to download the framework.
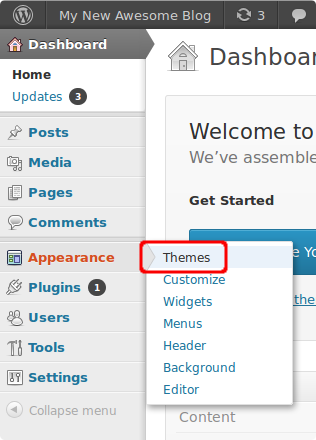
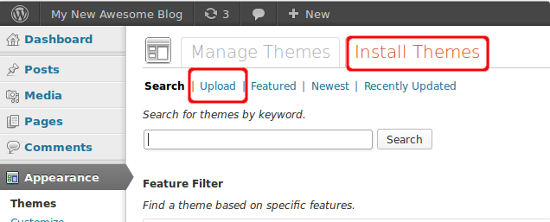
Now that you have the framework downloaded, head over to your WordPress blog admin area, go to Appearanceand click on Themes.
From there, click on the Install Themes tab and then click on the Upload link.
Browse for the Genesis Framework that you had just downloaded and then click on Install Now to proceed with the installation.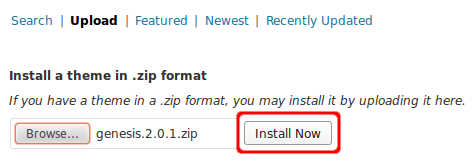
Finally, Activate the theme on your site.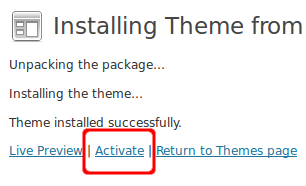
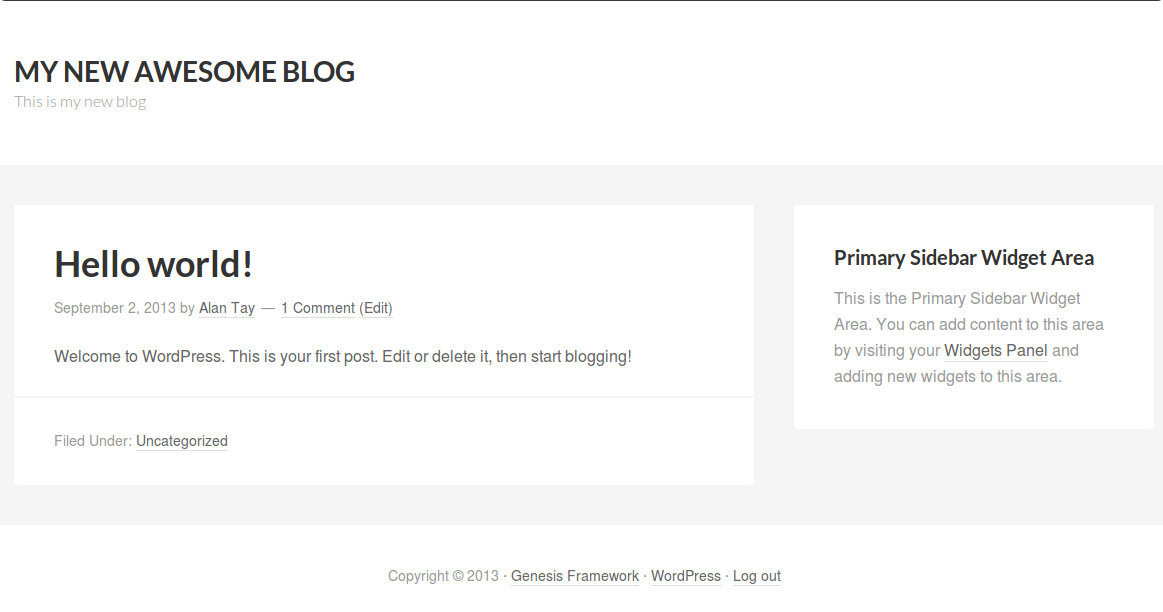
You should now see that your site is running on the Genesis Framework.
#2 – Install a Child Theme
Installing a child theme into the Genesis Framework is quite simple as well.
What you need to do is to follow exactly what you did in the first step above and then choose the Child Theme instead of the Genesis Framework package.
Note that you need to have the Genesis Framework installed first before you can have the Child Theme.
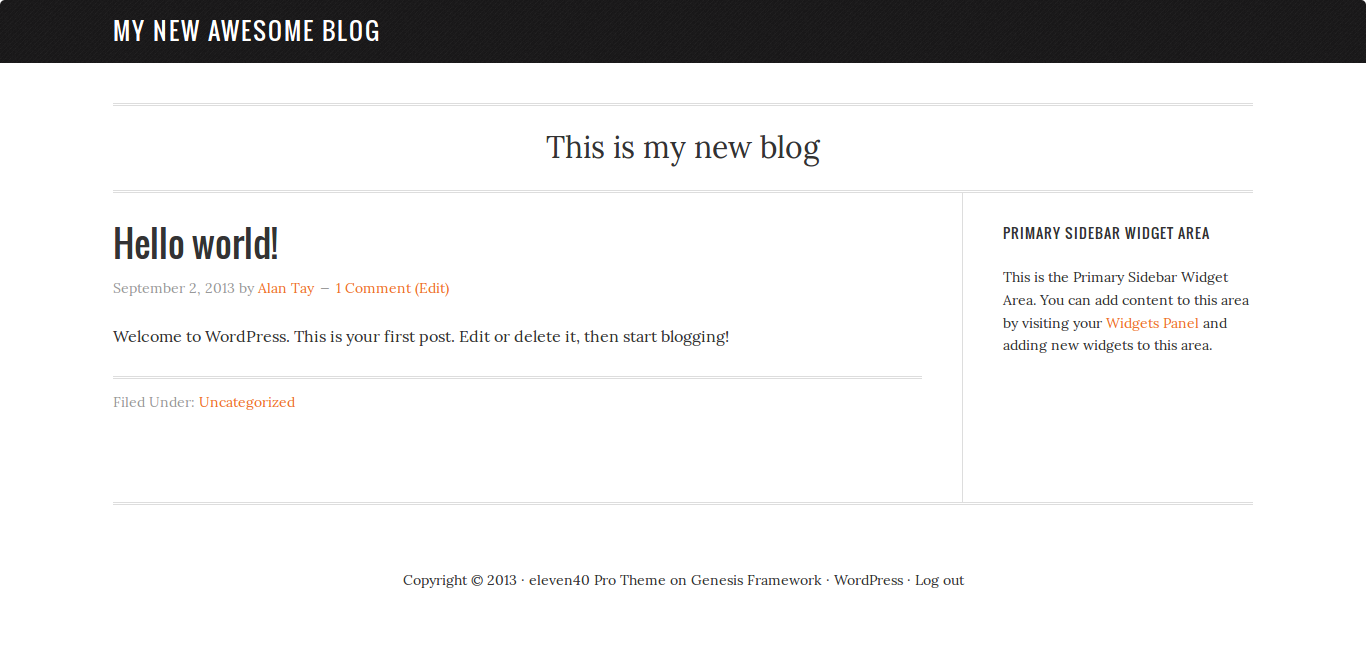
In this demonstration, we will use the Eleven40 Pro Child Theme.
Once you had the child theme installed, your site will look as below.
#3 – Change the color style
Majority of Studiopress themes come with a collection of color style to choose from.
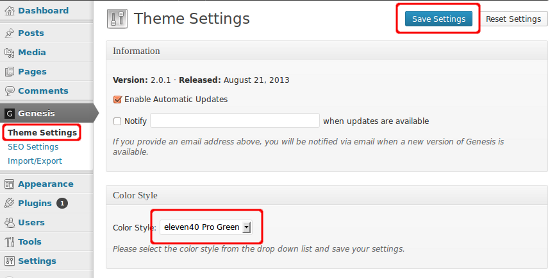
To change the color style of a child theme, go to Genesis and click on Theme Settings.
Under the Color Style section, select your desired color and finally click on Save Settings.
In this demo, we will use the Green color style.
#4 – Setup your default layout
In the Genesis Framework, it is pretty easy to setup the layout of your web page.
The layout I mean here is how you want your site to look like. E.g.:
- Single Sidebar on the left
- Two Sidebars on the right
- Left and right Sidebar
- No Sidebar
For each page or post, you can also set a different layout.
In this configuration, you will setup the default one where all your page will look like as you set unless you change it.
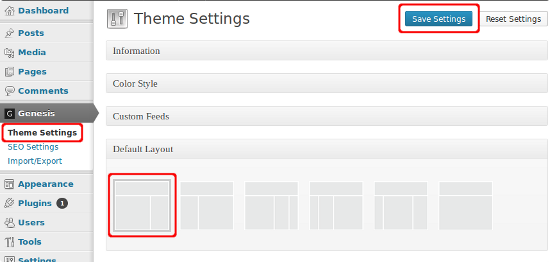
To set the default layout, go to Genesis and click on Theme Settings.
Under the Default Layout section, select your desired layout and finally click on Save Settings.
In this demo, we will use the Single Sidebar on the right.
#5 – Configure your RSS feeds link
In a very technical term, the RSS feeds is a XML file which enables publisher to syndicate data automatically. I grabbed this definition from Wikipedia and modify part of the sentence.
All my sites’ RSS feeds are managed by Feedburner where Feedburner is responsible of getting the updates from my sites whenever I do a blog post.
As a result, you can always grab my RSS feeds and use a RSS reader to read my content instead of browsing to my site.
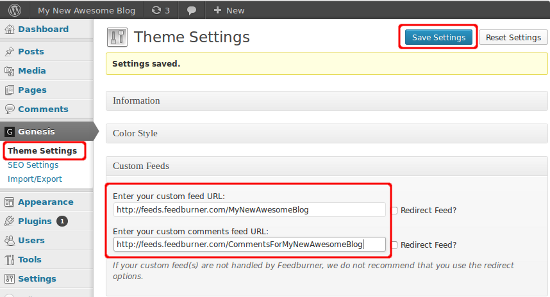
To set the feeds link, go to Genesis and click on Theme Settings.
Under the Custom Feeds section, insert your feeds URL and finally click on Save Settings.
If you still do not have a RSS link, you can continue to read on and I will guide you how to use the Feedburner service to manage your feeds.
If you already have a RSS link, just head over to tips #6.
Head over to the Feedburner site and login into the site. If you do not have an account, create one.
From the place where it says “Burn a feed right this instant“, insert your site URL and click on next as shown below.

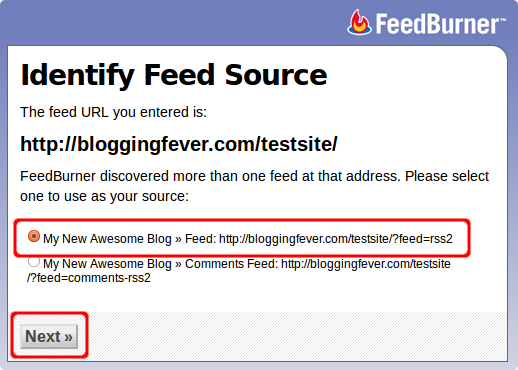
The first option is your post feeds while the second one is your comment feeds. For now, we will select the post feeds.
Select the first option and click on Next.
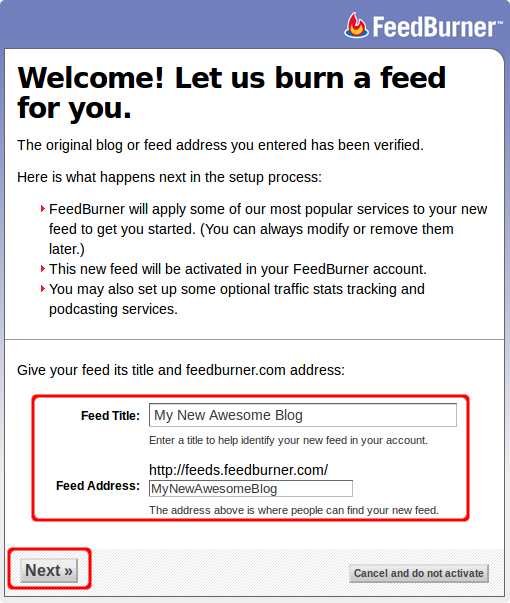
Specify your feed title, feed URL and click on the Next button to proceed.
Finally, copy the URL of your RSS feeds and insert into the Genesis Framework configuration.
You can burn your URL again to get the comment RSS and insert into the Genesis Framework.
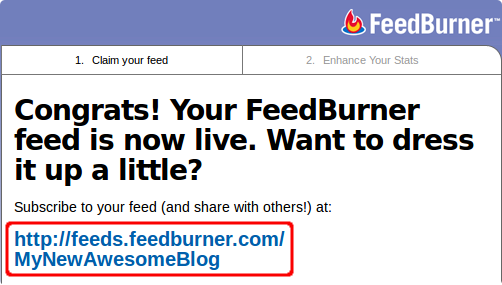
Although you had successfully integrate Feedburner into your WordPress blog, this does not mean you are done with Feedburner.
There are still quite a number of stuff that you can do with Feedburner but we will get into that in a different post.
#6 – Setup the footer
By default, you will have a footer at the end of every page of your site which has a backlink to Genesis Framework, it’s child theme, WordPress and the Login URL to your Admin area.
If you are cool with that, you can skip this step but if you want to change that to something else or include affiliate links of the Genesis Framework and your web hosting, you can easily do that as well.
First, you need a plugin to do this.
Go to Plugins and click on Add New. Search for genesis simple edit.
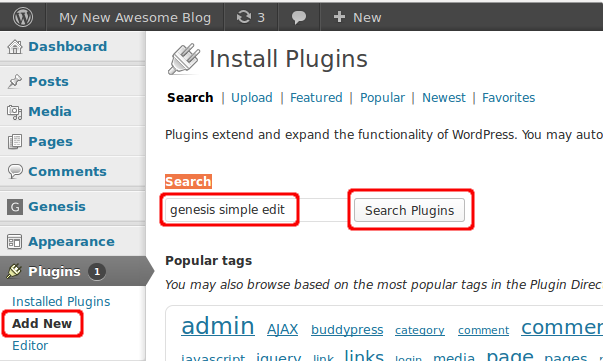
Locate the plugin “Genesis Simple Edits” from the search result and click on Install Now.

Once you had installed, activate the plugin.
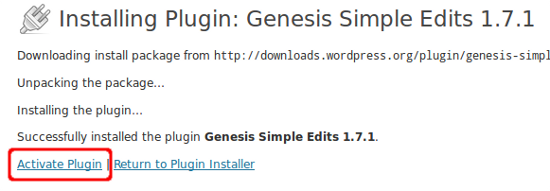
Configure the plugin by going to Genesis and click on Simple Edits.
Check on the checkbox that says “Modify Entire Footer Text (including markup)?” and insert your own HTML code.
You can use my simple version of HTML code here:
<p>Copyright © 2013 My New Awesome Blog powered by <a rel=”nofollow” target=”_blank” href=”http://your_affiliate_link_here”>Genesis Framework</a> </p></div>
Once you are done with it, click on Save Settings and you will see your footer is now simpler and has an affiliate link of the Genesis Framework.
#7 – Configure your homepage SEO
If you are still not sure what Meta Title and Meta Description is all about, below is a screenshot of how Blogging Fever looks like in the search engine.
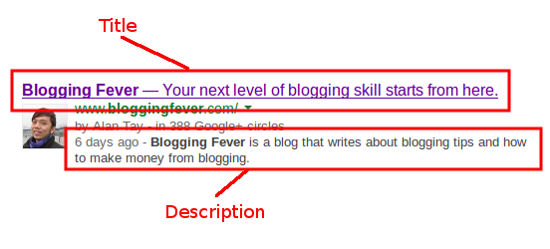
The Meta Title is what appears to be the title of my site in the search engine and the Meta Description is what describes my site.
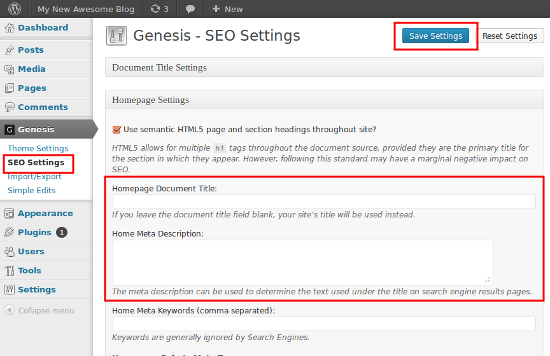
You can configure this from the Genesis Framework. Just go to Genesis and then click on SEO Settings.
Insert the title of your site into Homepage Document Title and the description into Homepage Meta Description.
Once you are done, click on Save Settings.
#8 – Setup your Author Box
One good thing about Genesis Framework is you can setup the Author Box at the end of every post.
It should look something like this at the end of every post:

To enable this on the Genesis Framework, you need to first setup your profile properly.
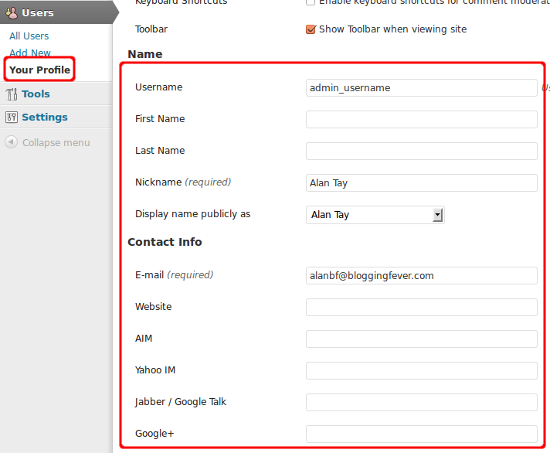
Go to Users and click on Your Profile.
Complete everything except for the fields which say AIM, Yahoo IM, & Jabber / Google Talk because those are optional.
Don’t save yet, you still have two more step to go.
Scroll down a little bit and fill up the Biographical Info.
This is the place to write whatever you want your Author Box to show.
3 tips for a good Author’s bio are:
- Who you are.
- What you do.
- Call for action to your Mailing List subscription or your landing page.

Finally, check on the box that says Enable Author Box on this User’s Posts
Once you had done this, click on Update Profile at the end of the page.
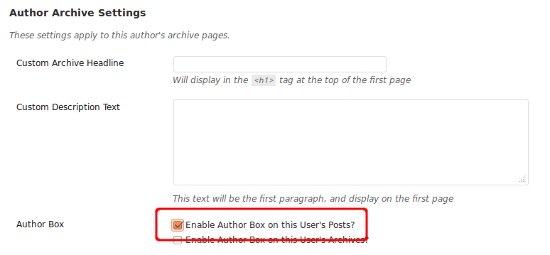
Notice that you don’t have an option to upload image here but I do have a nice image of myself in the Author Box.
This can be done by signing up for an account with Gravatar.
Once you have an account with Gravatar, upload an image and make sure that the email address used for that image is the same as what you had configured in your User Profile in this page.
#9 – Setup your Google Authorship
Again, I would like to show you how my site looks like on the search engine because it is easier for you to visualize what Google Authorship is.

Notice that my blog post on Google has my image attached right beside it. This is partly what Google Authorship is.
It increased CTR of your blog post on the search engine whether you like it or not.
To configure this, ensure that you had filled up the Google+ field earlier in the User Profile of your WordPress blog.
Once you are done with that, sign up for a Google+ account from here.
Once you completed the sign up, go to your profile by hovering your mouse pointer to the left side of the screen.
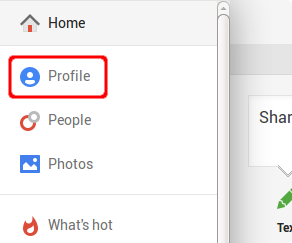
Insert your site name and URL into the Contrinbutor section of your profile.
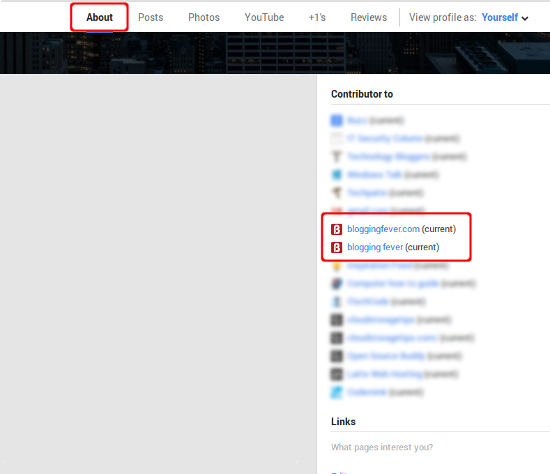
Remember that your Google+ Profile needs to be as complete as possible as well.
Make sure you already have your name, description and most importantly, your image in place.
#10 – Configure your permalinks
Somehow by default, the WordPress blog uses a meaningless blog post URL that is the ID of your post.
Maybe it is really useful in certain ways but not for us, bloggers.
What we need instead is to have the post title at the back every URL.
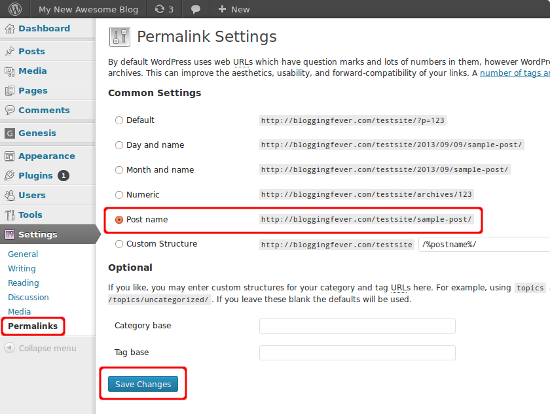
Forgive me if I had explained this poorly here but a screenshot below will best explained what I tried to achieve so far.
Go to Settings and click on Permalinks.
Select the Post Name option and click on Save Changes.
Are we done yet?
Yes, for now but there are still a couple of things to deal with.
However, if you had done up to this far, your site should not be overly bad for the moment.
I’m not done yet because I have still a lot more to show here. So do subscribe to my mailing list so that you will not miss any of my updates on building a blog with WordPress.
Don’t forget to checkout my review on Genesis Framework if you find this framework is cool here.
Finally, if you like what I had been doing so far, do give a like, tweet and plus on this post and tell me what you expect more from me. Love the social media.


I’m curious to find out what blog platform you are using? I’m having some minor security problems with my latest blog and I would like to find something more safe. Do you have any suggestions?
Klaudia recently posted..Ochrona przed komornikiem
Hi Klaudia
Sorry for the late reply. I am using the WordPress blogging platform here. May I know what security problem that you faced?
Alan Tay recently posted..Here are 10 quick tips to get started with Genesis Framework
This is a great resource. I see so many people who use WordPress or Genesis and don’t know how to change the permalinks on their site.
Erin recently posted..Best Genesis Child Themes for 2013
Thanks for dropping by, Erin.
Alan Tay recently posted..Here are 10 quick tips to get started with Genesis Framework
Thanks for taking the time to put these all together. They seem to take an awful lot of work; congratulations for coming up with a very detailed and informative post. More power.