
Have you ever try to go to a site and feel that the loading speed is extremely slow?
So, what did you do? Wait?
In fact, I am quite a man with patience and I can really give a lot of time to waiting. However, not everyone in this world can really wait.
Even I myself, at times will just leave a site without waiting for far too long.
So this is issue number one if you have a site that load extremely slow. Although you can produce a super master piece writing, but it is useless without people reading it.
Secondly, if the owner does not care about his site’s speed, why should I care reading his contents? As I begin to wait for the site to load, I already have a lot of bad impression to the site.
This is not a good sign because you would rather impress your visitors with your awesome speed and design over a poor loading speed, wouldn’t you?
As a result, having a poor loading speed will greatly affect your visitors.
How to improve WordPress blog with caching
There is one plugin which I had implemented into all my blogs is the WP Super Cache. Yes, I implemented cache and how does caching improve a web page? This is what defined a web cache from Wikipedia:
Latest update: I am now using W3 Total Cache.
A web cache is a mechanism for the temporary storage (caching) of web documents, such as HTML pages and images, to reduce bandwidth usage, server load, and perceived lag – Wikipedia
So, by having a temporary storage, your visitors will enjoy a better performance by not dealing with your web hosting for every minor requests. To start up with this plugin, all you need to do is to install it into your WordPress blog and activate it. Once you activated the plugin, you will need to do some configurations.
How to configure WP Super Cache
- At the confguration page, you will have several tabs and I will only focus into 4 tabs in this guide.
- First of all, is the Easy tab. There is nothing much you need to do here where all you need is just to enable the caching by selecting Caching On and save this configuration.
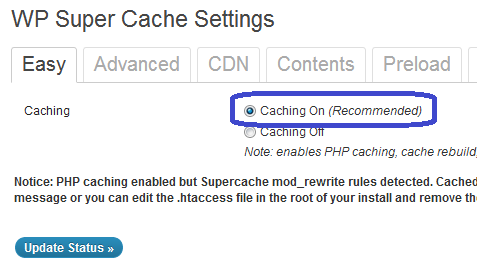
WP Super Cache – Easy Configuration - Next, move to the Advanced tab. In this tab, I would suggest to use the option Use mod_rewrite to serve cache files. (Recommended). It requires a bit more work in the .htacess file but it proves as well to have a better performance.
- Still in the same tab, what I did was to keep everything to it’s default and check whatever that is recommended.
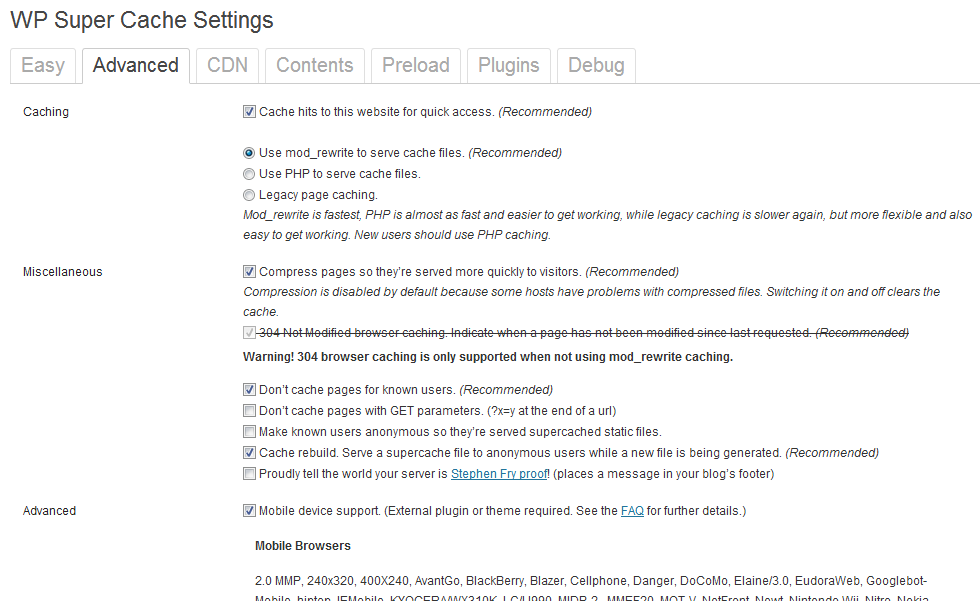
WP Super Cache – Advanced Configuration - The third tab is the CDN, Content Delivery Network where it is not a compulsory configuration, but is extremely useful for bloggers who host a lot of images on their blog. A CDN is not a free service but you can get it cheap from MaxCDN, the CDN which I use to host all the images for all my blogs.
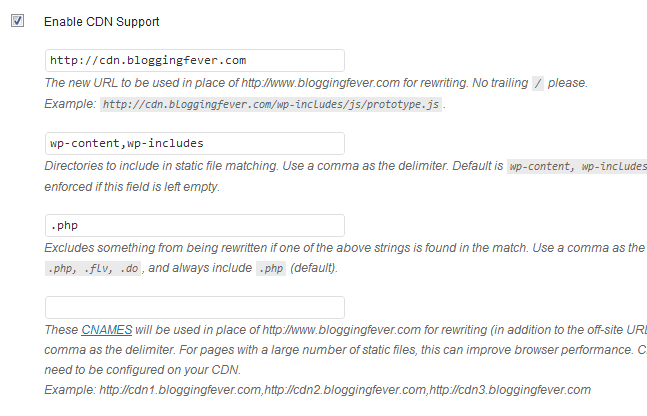
WP Super Cache – CDN Configuration - Lastly, is the Content tab. This tab is used whenever you had changed something in your blog, but do not see the difference. For instance, you might had installed a new plugin, activate it and implemented it but still can’t see it showing.
- If you are having this symptom, there is no need to panic or contact your web hosting. All you need to try first is to clear your cache by hitting the Delete Cache button.
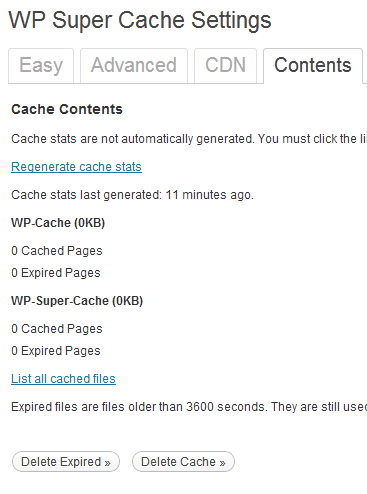
WP Super Cache – Content Configuration
What about W3 Total Cache?
If you are long in the blogging field, you might had come across the other popular plugin called W3 Total Cache.
I had personally tried that but I guess no luck with my performance using that. There are bloggers who feel W3 Total Cache performs better than WP Super Cache.
So in the end, it is back to you. Personally I feel WP Super Cache is better is because after trying both plugins, I had a better performance after some benchmarking and I think you should do the same as well.
If you are not sure how to benchmark your site, just head over to Web Page Test or GTMetrix to do it. I had been using them for blog performance benchmarking.
The post that you are currently reading is one of the WordPress Blog Setup series.
Image courtesy of: FreeDigitalPhotos.net




Leave a Reply